Choosing the Right Sandpaper for Wall Smoothing


Intro
Choosing the right sandpaper is crucial for achieving the desired finish when smoothing walls. Improper selection can lead to damaged surfaces or insufficiently prepared walls, affecting the final appearance of the paint or wallpaper. This article delves into the various types of sandpaper available and their specific applications for wall smoothing, offering guidance tailored for DIY enthusiasts and professionals alike.
Проектирование и планирование
Before starting any wall project, design and planning are fundamental. Consider how the room's overall aesthetic will influence your choice of materials and techniques. Planning involves assessing the project's scope and understanding the time you may need to invest.
Как выбрать проект для DIY
Choosing a project that fits your skill level and resources is essential. Evaluate whether your walls need minor touch-ups or a complete overhaul. For existing releases, minor areas may only require light sanding, whereas extensive imperfections may necessitate more aggressive methods.
Оценка времени и ресурсов
Time investment varies. Preparing walls effectively can take several hours, especially if the surface is uneven. Consider the materials, which include various sandpaper grits and sanding tools. Assess your workspace, making sure you have enough ventilation and enough supply of masks or goggles to ensure safety.
Выбор материалов
Selecting the right materials is integral to the success of any wall smoothing project. Different types of sandpaper are suited for various finishes and surface types.
Типы материалов для различных проектов
- Aluminum Oxide: Known for its durability, this type can be used on wood and drywall. Ideal for rough sanding.
- Silicon Carbide: This material excels in wet sanding, making it perfect for finishing work on painted surfaces.
- Garnet: More suitable for wood surfaces, garnet tends to wear out faster but provides a fine finish.
For wall smoothing, garnet sandpaper and aluminum oxide are often preferred. Choose based on the wall material and desired finish.
Советы по покупке и экономии
When shopping for sandpaper, consider buying in bulk, as it can reduce costs. Look for sales or discounts at local hardware stores. Additionally, use product reviews to guide your choice, focusing on durability and performance for wall preparation.
"The right sandpaper can transform a wall from rough to smooth, ensuring that paint adheres properly and looks professional."
Prelude to Wall Smoothing
When embarking on a DIY home improvement project, the importance of proper wall smoothing often gets overlooked. A smooth wall surface is not just visually appealing, but it also forms a foundation for the paint or wallpaper applied over it. This article focuses on the nuances of wall smoothing, particularly emphasizing the selection of appropriate sandpaper.
Understanding Wall Preparation
Wall preparation is a critical step in any painting or decoration process. It involves assessing the wall surface for imperfections such as bumps, cracks, or holes. Preparing the wall adequately ensures that paint adheres properly, that the finish is consistent, and that the final look does not show signs of underlying flaws. The key to effective wall preparation lies in the meticulous smoothing process, where sandpaper plays a central role. Choosing the right sandpaper can significantly affect the quality of the finish.
Importance of Choosing the Right Sandpaper
Selecting the appropriate sandpaper for wall smoothing cannot be understated. Different grades and materials of sandpaper are tailored for various tasks. For instance, coarse sandpaper may be useful for initial sanding to remove significant imperfections, while fine-grit sandpaper is ideal for finishing touches to achieve a polished look. Using the wrong type can lead to inefficient results, necessitating additional work.
"The choice of sandpaper can make the difference between a professional-looking finish and a subpar one."
Moreover, understanding the different grit levels helps in customizing the sanding technique to each specific wall surface. Not all walls are the same. Drywall, plaster, and wood require distinct approaches to achieve an even surface suitable for painting. With the proper guidance on sandpaper selection, homeowners and DIY enthusiasts can ensure their walls are flawlessly prepared, setting a solid stage for the finishing touch.
Types of Sandpaper
Understanding the types of sandpaper is crucial for achieving a smooth finish on your walls. Each type varies in grit, material, and intended use. The selection influences not only the quality of your work but also the efficiency of the sanding process. Using the appropriate sandpaper type can significantly reduce the time and effort needed to prepare surfaces while ensuring a professional appearance.
Grit Levels Explained
Grit levels determine how rough or smooth a sandpaper is. They range from coarse to fine, each suited for specific tasks. Grit refers to the size of the particles adhered to the backing of the sandpaper. Understanding these levels is essential for effective wall smoothing.


Coarse Grit
Coarse grit sandpaper typically has a grit number between 40 and 60. This type is effective in removing material quickly. It helps in leveling out uneven surfaces and stripping old paint. The key characteristic of coarse grit is its aggressive cutting ability. Due to this, it is a popular choice for initial sanding phases.
One unique feature of coarse grit is that it can create deep scratches. Therefore, it must be followed by finer grits for a smoother finish. Its advantages lie in its efficiency, while its disadvantage is potential damage to the surface if overused.
Medium Grit
Medium grit sandpaper ranges from 80 to 120. This type is suitable for general sanding between coats of paint or primer. It balances material removal with surface refinement. The main characteristic of medium grit is its versatility. Users often find it beneficial for smoothing surfaces that have already been sanded with coarse grit.
Medium grit serves as a bridge between rough and fine sanding. It removes marks left by coarser grits without being overly aggressive. However, it may not effectively smooth out larger imperfections, which can be seen as a limitation.
Fine Grit
Fine grit sandpaper usually has a grit number from 180 to 220 or higher. This category is designed for finishing touches and achieving a sleek, smooth surface. The notable characteristic of fine grit is its ability to refine surfaces without deep scratches. This makes it ideal for detailed work before applying final coats of paint or finish.
Fine grit is advantageous because it ensures a professional-looking result. However, using it on rough surfaces may not be effective, as it may require additional passes for material removal. Therefore, balance is key when selecting grits.
Sandpaper Material Options
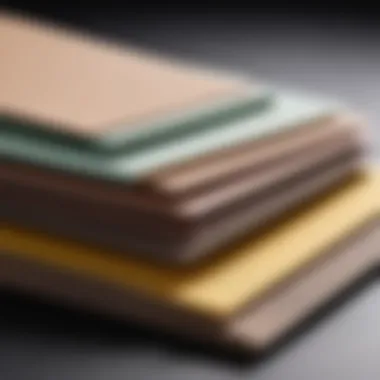
The material of sandpaper affects its durability, effectiveness, and suitability for different jobs. The three common materials include aluminum oxide, silicon carbide, and garnet. Each offers distinct advantages and limitations depending on the task at hand.
Aluminum Oxide
Aluminum oxide is widely regarded for its durability and performance. It lasts longer than many other materials, making it a cost-effective choice. The primary characteristic is its resistance to wear, which allows for use on various surfaces including wood and metal. Users appreciate aluminum oxide for its versatility.
One unique feature is its self-sharpening quality. As it wears down, new sharp edges are exposed. This results in consistent cutting performance. However, the downside is that it may not be as effective on softer materials compared to finer alternatives.
Silicon Carbide
Silicon carbide is known for its sharpness and is ideal for sanding harder materials. Its grit ranges from coarse to fine, making it versatile. The significant characteristic of silicon carbide is its ability to work effectively on surfaces like fiberglass and plastic. This material breaks down quickly, which allows for a consistent cut.
Its primary advantage is its use in wet sanding applications. However, it tends to wear out faster compared to aluminum oxide, which can lead to increased costs over time.
Garnet
Garnet sandpaper has a natural abrasive quality and is preferred for woodworking. Its main characteristic is its ability to produce a smooth finish. Garnet particles tend to wear down quickly, providing a consistent and fine result. This makes it an excellent choice for final sanding tasks.
Users often favor garnet for its organic texture. However, its durability is less than that of aluminum oxide, leading to a shorter lifespan in demanding conditions. This trade-off between finish quality and longevity is critical for users to consider.
Choosing Sandpaper for Different Surfaces
Choosing the right sandpaper for different surfaces is a critical aspect of wall smoothing. Every wall material demands specific approaches and sandpaper types. Not all sandpaper will yield the same results on different surfaces, hence understanding these differences vastly improves both efficiency and effectiveness in DIY projects. By aligning the grit type and material to the wall surface, one can ensure that the final finish is not just smooth but also visually appealing and durable.
Preparing Drywall
Initial Sanding Techniques
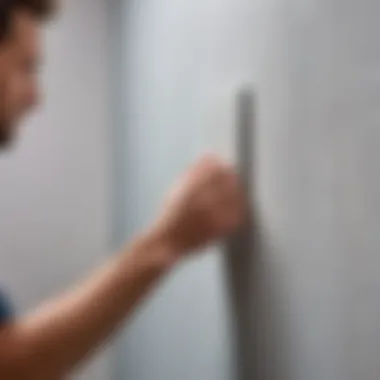
When starting the sanding process for drywall, the goal is to prepare the surface well. This includes smoothing out joints, seams, and any imperfections left from the installation process. The use of a medium-grit sandpaper initially is often recommended. Grits around 120 to 150 work well in this stage. This choice strikes a balance between effectively removing the rough spots without overly damaging the drywall.
One key characteristic of initial sanding techniques is the pressure used. A lighter touch is beneficial. Over-sanding can create gouges or uneven areas. This technique is popular because it allows for faster progress while preserving the integrity of the drywall.
Additionally, it is important to sand in a circular motion. This helps to minimize visible scratches. However, one must be cautious; using too coarse a grit might lead to uneven textures that are hard to remedy later.
Finishing Touches
Finishing touches on drywall are crucial as they define the final appearance of the surface. After the initial sanding, a higher grit sandpaper, typically around 220, is used. This finer grit smooths out any minor imperfections that remain after the first pass.


The key characteristic of this stage is the focus on finishing quality. Utilizing a fine grit here is beneficial because it imparts a professional finish to the wall. This process enhances the paint adhesion and results in a uniform surface.
However, using an overly fine grit too early can be a disadvantage. It may not effectively remove the necessary debris from previous work. Thus, patience is key. Properly executed finishing touches significantly improve the appearance of the final product.
Sanding Plaster Walls
Best Grits for Plaster
Plaster walls require a more careful approach due to their unique texture and composition. For initial sanding, a grit between 80 and 120 works well. This ensures that the roughness from the application is evened out without damaging the plaster underneath. In subsequent passes, switching to finer grits like 180 can improve the surface.
A notable advantage of using appropriate grit is the prevention of larger particles from being embedded in the plaster surfaces. Utilizing the right grit for each phase of sanding helps achieve a very smooth finish, suitable for painting or wall coverings.
Avoiding Damage
Avoiding damage when sanding plaster walls is essential. Because plaster is more brittle compared to drywall, excessive pressure or too coarse a grit can result in cracks or chipped areas. The strategy is to use lighter pressure and a gentle hand during the process.
One significant characteristic of this is being aware of the plaster's condition before starting. If there are any existing cracks, using an overly aggressive technique could worsen the situation. Therefore, a more measured approach is recommended.
This method is beneficial not only for maintaining the aesthetic of the plaster but also for ensuring that repairs don't become necessary later on. Taking the time to identify appropriate sanding practices saves effort and provides a satisfying end result.
Techniques for Effective Sanding
When it comes to wall smoothing, understanding the correct techniques for sanding is vital. The effectiveness of your sanding process can greatly influence the final outcome of your home improvement project. Proper sanding helps achieve a smooth surface, which is essential for effective paint adhesion and overall aesthetic appeal. Selecting the right technique will ensure efficiency, reduce fatigue, and minimize errors, leading to a professional-looking finish.
Hand Sanding vs. Power Sanding
Hand sanding involves manually using sandpaper to smooth surfaces. This technique offers a level of control that power sanding may not provide, especially on smaller or delicate areas. It is ideal for touch-ups and intricate work, enabling the user to focus on trouble spots that may need more attention. However, the downside to hand sanding is that it can be time-consuming and labor-intensive, which may not be practical for larger surfaces.
On the other hand, power sanding utilizes electric tools designed to automate the sanding process. This method significantly increases efficiency and can handle larger areas quickly. Power sanders often come with various settings to adjust speed and power, making them versatile for different tasks. However, there is a risk of removing too much material, which can lead to uneven surfaces or damage if not handled properly.
Ultimately, the choice between hand sanding and power sanding depends on the scale and specifics of your wall smoothing project.
Sanding Patterns
Choosing the right sanding pattern is crucial for achieving a smooth finish. The strategy you select can determine how well the surface is prepared for painting or finishing.
Circular Motion
Using a circular motion while sanding is a favored method among many DIY enthusiasts. This technique allows for even pressure distribution, reducing the risk of creating gouges in the surface. The key characteristic of circular motion is its ability to blend transitions between different areas, especially if using various grits.
Advantages of circular motion include:
- Reduced chances of scratching the surface unnecessarily.
- Enhanced ability to work around contours and curves.
- Greater control over pressure application.
However, one potential disadvantage is that it may require more effort to keep an even pace. If done carelessly, it can lead to uneven surfaces.
Straight Lines
Sanding in straight lines is another widely practiced approach. This technique often works well for flat surfaces, providing a clear and consistent sanding pattern. It can be particularly efficient for preparing larger flat areas quickly.
Key characteristics of sanding in straight lines:
- Allows for a straightforward approach to leveling surfaces.
- Easier to track progress and identify areas that need more attention.
Despite its benefits, the main downside of this method is the risk of creating noticeable sanding marks, especially if the pressure is not managed well. If too much pressure is applied, the risk of sanding scratches increases.


Safety and Best Practices
Safety and best practices are essential components of wall smoothing projects. Ensuring a safe work environment not only protects the individual but also enhances the quality of the finished product. By adopting proper safety measures, DIY enthusiasts can minimize health risks and avoid common pitfalls associated with sanding.
Personal Protective Equipment
Dust Masks
Dust masks serve a vital role in wall smoothing tasks, particularly when sanding surfaces that generate fine dust particles. These masks are designed to filter out airborne particles, which can lead to respiratory issues if inhaled. The key characteristic of dust masks is their ability to provide a barrier against dust while allowing ease of breathing. This feature makes them a suitable choice for anyone involved in sanding tasks.
When selecting a dust mask, look for models that have a high filtration efficiency rating. Masks with N95 or better classification are popular for their effectiveness in blocking out fine particles. While they provide good protection, dust masks may become uncomfortable over extended periods, requiring a balance between comfort and safety.
Eye Protection
Eye protection is another critical aspect to consider when undertaking wall smoothing tasks. It helps guard the eyes from dust, debris, and any particles that may be dislodged during the sanding process. The primary characteristic of eye protection is its design, which should be capable of providing a snug fit while allowing for visibility. Safety glasses or goggles are the common choices for this purpose.
A unique feature of quality eye protection is the anti-fog coating. This coating helps maintain clear visibility, particularly during extensive sanding operations. Using proper eye protection reduces the risk of irritation or injury to the eyes, thus making it a wise investment for any sanding project.
Proper Cleanup Procedures
After sanding is completed, following proper cleanup procedures is crucial. Proper cleanup not only preserves the quality of the work area but also contributes to overall safety. Dust and debris can accumulate quickly, creating potential hazards.
Begin by gathering dust using a vacuum equipped with a fine dust filter. This is more effective than simply sweeping the area, which may stir up residual dust into the air. Use damp cloths to wipe down surfaces and ensure that all particles are removed.
Finally, dispose of collected dust and debris in accordance with local regulations. This promotes environmental responsibility and maintains a safe workspace for future projects.
Common Mistakes to Avoid
Understanding the common mistakes that can occur during wall smoothing is essential for anyone involved in do-it-yourself home improvement projects. When it comes to choosing the right sandpaper, errors often stem from a lack of knowledge or oversight regarding grit, technique, and application. These mistakes can lead to suboptimal finishes, increased workload, and wastage of resources. By recognizing and avoiding these common pitfalls, DIY enthusiasts can significantly enhance the quality of their work and achieve professional results.
Using the Wrong Grit
One of the most frequent errors is selecting the incorrect grit for the task at hand. Choosing a grit level that does not correspond to the wall's condition can result in various issues. For instance, using a coarse grit on a surface that merely needs minor touch-ups will likely leave visible scratches, which requires additional sanding to rectify. Conversely, using too fine a grit can fail to adequately smooth rough textures, leading to an uneven surface that does not adhere well to paint or wallpaper.
Here are some key considerations when selecting the right grit:
- Assess Surface Condition: Before choosing sandpaper, examine the wall. If there are surface imperfections, a coarse grit (like 60 or 80) may be necessary to start. For smoothing, medium grits (120 or 150) are often more suitable.
- Grit Progression: Avoid stagnation by moving from coarse grit to finer grits in a systematic manner. This helps to progressively refine the surface rather than creating deeper scars with improper grit levels.
- Consult Guidelines: Familiarize yourself with general guidelines for grit selection based on the material being worked on: drywall typically requires different grits compared to plaster or pre-finished surfaces.
"Using the right grit can save time and resources spent on unnecessary rework."
Over-Sanding Issues
Another common mistake relates to over-sanding, which can be just as detrimental as using the wrong grit. This occurs when excessive material is removed, which may compromise the wall's integrity. Over-sanding can also lead to noticeable dips and hollows in the surface, resulting in an uneven finish that distracts from the overall appearance.
To avoid over-sanding, consider these tips:
- Monitor Pressure: Apply gentle pressure while sanding. Let the abrasiveness of the sandpaper do the work rather than pushing hard, which can lead to unnecessary material removal.
- Use a Light Touch: When using finer grit sandpaper, adopt a lighter hand. This helps prevent creating unevenness or damaging the underlying surface.
- Take Breaks: Periodically check your progress rather than sanding continuously. This allows you to assess the surface and adjust your technique accordingly.
- Use a Guide: If applicable, using a block or an even sanding tool can help ensure uniform pressure across the surface.
Epilogue
In the realm of wall smoothing, the choice of sandpaper significantly influences the final outcome. It is not just about achieving a flat surface; it is about enhancing the overall aesthetics and integrity of the wall. The right sandpaper ensures that imperfections are minimized, contributing to a professional finish.
When selecting sandpaper, various elements should be considered such as grit levels, material types, and the specific surface to be treated. Each type of sandpaper is designed to perform differently based on these factors. Thus, understanding these aspects is crucial for achieving optimal results.
Recap of Key Points
- Grit Levels: Different grits serve unique purposes. Coarse grits are ideal for heavy material removal, while fine grits provide the smoothness needed for finishing touches.
- Material Options: Selection of sandpaper material, whether aluminum oxide or garnet, directly affects performance. Each material has its strengths and suitable applications.
- Surface Preparation Techniques: Effective preparation techniques vary for drywall and plaster, affecting the level of smoothness achievable. Recognizing these differences is essential for effective sanding.
- Common Mistakes: Avoiding oversanding and selecting inappropriate grit are common pitfalls that can lead to unsatisfactory results. Awareness of these mistakes helps in preventing them.
Final Thoughts on Wall Smoothing
In summary, wall smoothing is a process that demands attention to detail and an understanding of various sandpaper types. Proper selection of sandpaper not only enhances wall aesthetics but also extends the durability of the surface. This makes choosing the right sandpaper a critical task for anyone engaged in DIY projects, interior design, or construction.
Investing time to understand your materials and methods pays off with a finish that reflects professionalism. Therefore, next time you embark on a wall smoothing project, remember the significance of each decision you make regarding sandpaper.


