Installing Foam Ceiling Cornices: A Step-by-Step Guide

Intro
When it comes to sprucing up your living space, few things can elevate a room quite like foam ceiling cornices. These decorative elements not only add a touch of elegance but also help cover up the unsightly gaps between walls and ceilings. Installing them may seem daunting, especially in corners where angles can often be tricky. However, with the right guidance and a little elbow grease, you can achieve a professional-looking finish yourself. This section aims to lay the groundwork for your installing journey by covering key design and planning aspects, as well as material selection.
Проектирование и планирование
Как выбрать проект для DIY
Before diving into the installation process, take some time to consider your project's design. You need a clear picture of how you’d like your foam cornices to look. Do you prefer a traditional style, or are you leaning more towards a modern, sleek finish? Moreover, assessing your room dimensions is crucial. Measurements should be taken precisely. Tape measures can sometimes be tricksters, so it's wise to double-check the readings to avoid any costly miscalculations.
Another important consideration is how the cornices will compliment the existing decor in your home. Will they enhance the aesthetics of the colors and textures already present? Think about how the style and color of the cornices unite with your furniture, color schemes, and overall ambiance. A cohesive look pulls the entire space together.
Оценка времени и ресурсов
Next, estimate both the time and resources you'll need for this undertaking. Generally, installing foam ceiling cornices isn’t a multi-day project if you stay organized and focused. Here's a quick breakdown:
- Preparation Stage: Gather your tools and materials. Allow a few hours for this.
- Installation: Depending on the complexity and the corners involved, expect to spend around two to four hours.
- Final Touches: Allow time for clean-up and touch-ups. This might take an additional hour.
Understanding and planning these elements will help you stay on track and ultimately make the whole process far less overwhelming.
Выбор материалов
Типы материалов для различных проектов
Not all foam cornices are created equal. You'll encounter various types, each suited for different aesthetics and purposes. For instance, consider whether you want a plain or a patterned design. Some options include:
- Plain Styles: Great for modern designs, easy to install, and require less preparation.
- Ornate Designs: Adds a vintage flair but may require more finesse during installation.
- Water-resistant Options: If you are installing in kitchens or bathrooms, this material resists moisture and prevents damage.
Choosing carefully based on your room's characteristics will save you both hassle and future repairs.
Советы по покупке и экономии
When it comes to buying foam cornices, consider shopping at local home improvement stores or online marketplaces. Some tips include:
- Compare Prices: Just like shopping for shoes, it's best to have options.
- Bulk Purchases: Sometimes, buying in bulk can save money in the long run.
- Look for Sales: Keep an eye on seasonal sales or clearance events. A little patience can lead to significant savings.
Ultimately, selecting the right materials and making thoughtful purchases lays a solid foundation for a successful installation. It's not just about appearance; it's about ensuring longevity and durability in your design choices.
Foreword to Foam Ceiling Cornices
Foam ceiling cornices are more than just decorative elements; they play a significant role in enhancing the aesthetics of a room. When done right, they can completely transform a bland ceiling into a visually appealing space. The importance of understanding how to install foam ceiling cornices cannot be understated, especially for DIY enthusiasts aiming to elevate their home decor.
Understanding Foam as a Material
Foam, in the context of cornices, is lightweight yet durable, making it a preferred choice for both professional installers and DIYers. The key feature of foam is its flexibility which allows it to be molded into various designs and shapes. Unlike heavier materials, foam is easy to handle and can be cut to fit different angles and contours, which is especially important for corner installations.
In terms of finishing, foam can be painted or left in its natural color, providing versatility according to individual preferences. The ease of application is another advantage; it requires minimal tooling, making the installation process less daunting. Some types of foam even come pre-primed, allowing for a flawless paint job without additional cost or effort.
Benefits of Using Foam Cornices
Utilizing foam cornices in home improvement projects carries several advantages:
- Cost-Effective: Foam is generally cheaper than traditional materials such as wood or plaster. This opens up DIY projects to a wider audience, especially those working on a budget.
- Lightweight: The low weight of foam means that anyone can manage and manipulate it single-handedly. This is particularly beneficial for solo projects, allowing for a safer installation process.
- Ease of Installation: The installation process for foam cornices is straightforward. With basic tools, even novice craftsmen can successfully add these decorative accents to their homes.
- Diverse Styles: From classic designs to modern looks, foam cornices are available in various styles, giving homeowners ample options to choose from to match their interior design.
- Low Maintenance: Foam is resistant to cracking compared to other materials, meaning once installed, it requires minimal upkeep, saving time and effort in the long run.
"Installing foam ceiling cornices can lead to a sense of completed aesthetics in a room, bridging the gap between wall and ceiling seamlessly."
With these benefits in mind, it’s clear why foam cornices are a popular choice among those looking to enhance their living spaces. As we delve further into this guide, we will outline the preparation and installation steps in detail, ensuring readers feel empowered to embark on their own creative projects.

Preparation for Installation
Setting the stage for a successful installation of foam ceiling cornices is crucial. Just like a builder wouldn’t start erecting a house without laying a solid foundation, beginning the installation process without adequate preparation can lead to a multitude of issues. This phase involves understanding the space where the cornices will be applied, rallying the necessary tools, and selecting the most suitable foam cornices. Each of these elements plays a pivotal role in ensuring a smooth workflow and achieving a polished finish.
Assessing the Space
Before one can dive into putting up cornices, it’s essential to take a good look around. Assessing the space means taking note of a few key factors. Firstly, you should measure the dimensions of the walls or ceilings where the installation will happen. Utilize a tape measure to gather the height, width, and any relevant angles that might affect the cornice installation. Next, consider the aesthetics of your room; think about how the cornices will tie into the overall design. Are there existing light fixtures or architectural features that need to be considered? All such factors will influence how the foam cornices complement or contrast with the space.
Here’s a quick checklist to help with assessing the area:
- Measure wall and ceiling dimensions
- Look for existing structures (light switches, fixtures)
- Consider aesthetic elements (turns, window frames)
Taking these steps ensures that when you move on to the next phases of installation, you won’t find unexpected challenges cropping up.
Gathering Required Tools
Think of gathering your tools like preparing for a baking session: you wouldn't want to realize halfway through that you're missing a crucial ingredient. To avoid any hiccups during your project, it’s crucial to collect all the tools you’ll need before you commence. The list of essential tools for installing foam cornices typically includes:
- Tape measure: For precise measurements.
- Utility knife: To cut the foam cornices to the required size.
- Adhesive applicator: A means to apply your chosen adhesive evenly.
- Level: To ensure that your installation is straight and true.
- Sanding block: For smoothing any rough edges on your cornices.
Having everything on hand not only saves time but also aids in maintaining the focus on the installation itself. No one likes to be scrambling around for that utility knife while working with adhesive!
Selecting the Right Foam Cornices
Choosing the right foam cornices isn’t just about the look. It needs to factor in dimensions and style to align with the decor of your space effectively. Foam cornices come in various styles and sizes, which can range from simple, clean lines to more ornate designs. When selecting, consider the following:
- Style preference: Does your room lean toward modern or classic décor?
- Size compatibility: Ensure the selected cornices fit well with your ceiling height.
- Thickness and density: Thicker foam provides a more substantial feel, while lighter cornices might be easier to handle during installation.
Keep in mind that foam cornices can also be easily painted, which offers a chance to personalize them further. Opting for a white finish can yield a clean, subtle look that can adapt to any color scheme.
In short, preparation is not just a background task; it sets the tone for the entire installation journey. Taking the time to assess the space properly, gather the right tools, and choose suitable foam cornices enhances the chances of a successful and aesthetically pleasing result.
"Preparation is the key to success. Without it, you might as well be trying to find your way in the dark."
Approaching this phase thoughtfully will help navigate the intricacies of installation, making the process less daunting and much more gratifying.
Measuring and Cutting Cornices
Measuring and cutting foam ceiling cornices is not just a mere task, it’s a vital component in achieving that polished and professional finish that homeowners or designers often crave. The success of your installation largely hinges on how well you measure and cut each piece. Missteps in this stage can lead to unsightly gaps or improper alignment, derailing all your hard work.
When handling foam cornices, keep in mind the unique properties of the material. Foam is generally lightweight and easy to handle, but its malleability can be both a blessing and a curse. A proper measurement allows you to cut efficiently, ensuring a fit that hugs the angles of your room snugly. It’s like trying to find the perfect pair of shoes; they need to fit just right to avoid discomfort. Mistakes here not only waste materials but also increase the time spent correcting errors.
Techniques for Accurate Measurements
- Use a Reliable Measuring Tape: When measuring your ceiling corners, always reach for a high-quality measuring tape. These tools can provide precision that’s essential for clean corners.
- Double-Check Measurements: It’s prudent to measure twice and cut once, as the old adage goes. Take the time to validate your numbers before you reach for those cutting tools.
- Account for Overlaps at Corners: Angles can be tricky, particularly in corners where two pieces of cornice meet. Take into consideration the overlap that will occur when installing. Adding an extra half inch can help avoid gaps.
"Good measuring is half the battle in any installation project. When in doubt, measure again!"
Cutting Cornices to Fit Corner Angles
Cutting foam cornices to fit corner angles requires a meticulous approach. The goal is to create a seamless appearance at junctions, which enhances the overall aesthetic of the ceiling. Here’s how to do it right:
- Understand Your Corners: Most corners are not perfect 90-degree angles. Instead, many rooms have varying degrees of angles. Use a protractor to gauge the angle, and then adjust your cutting approach accordingly.
- Use a Miter Box: For sharp angles, a miter box can be a lifesaver. This tool allows you to create precise angled cuts, giving that smooth finish at the corners which is ideal for foam cornices.
- Practice on Scraps: Before committing to your actual cornices, practice on scrap pieces. This helps get a feel for the cutting method and ensure you’re achieving the desired angle without wasting material.
Tools for Cutting Foam Cornices
Selecting the proper tools can make all the difference when cutting foam cornices:
- Sharp Utility Knife: A good utility knife can slice through foam easily without jagged edges. Fresh blades will provide cleaner cuts and require less effort.
- Miter Saw: For those who have access to more advanced tools, a miter saw can deliver precise cuts with less manual effort. This is particularly useful for larger installations and ensures uniformity.
- Fine-Toothed Saw: A fine-toothed hand saw can also be effective, especially when working on smaller pieces or when cutting delicate patterns into the foam.
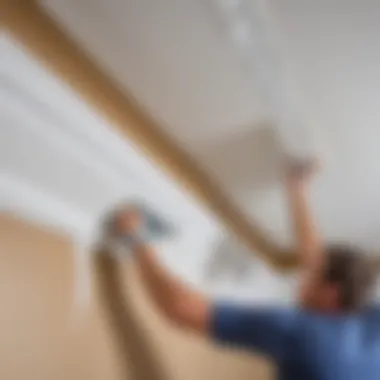

Adhesion Strategies
When it comes to installing foam ceiling cornices, the strength of the bond between the cornice and the surface is crucial. Proper adhesion strategies not only ensure a secure fit but can also prolong the life of your installation, keeping those joints nice and tidy for years to come. Selecting the right adhesive and applying it correctly can make or break your project. Understanding these elements can save time, effort, and money, ultimately delivering stunning results that enhance your home’s aesthetic.
Selecting the Appropriate Adhesive
With various adhesives available on the market, it’s important to choose one that works best for foam cornices. Generally, the best options are:
- Polyurethane Adhesives: These are known for their strong bond and versatility, suitable for different surfaces.
- Construction Adhesive: This can be ideal for larger projects or more significant loads, offering excellent strength.
- Foam-Safe Adhesive: Specifically formulated for foam materials, these adhesives minimize any risk of melting or damaging the foam.
Consider the surface you're working with as well. Different surfaces can react differently with adhesives. Test your adhesive on a small area if unsure. Don’t forget to take into account the environment, including humidity and temperature, which can affect the adhesive's performance.
Applying Adhesive to the Cornices
Now that you have selected the appropriate adhesive, how you apply it is just as crucial. Here’s how to do it right:
- ** Preparation**: Clean both the cornice and the surface where it will be applied. Dirt or dust affects bonding.
- ** Application Method**:
- Positioning: Align the cornice carefully and press firmly for a few seconds to establish contact. It’s handy to have a level or square on hand, so your cornice sits perfectly in line with the ceiling and wall.
- Clean Excess: Be ready with a clean cloth or sponge to wipe away any excess adhesive that may ooze out to maintain a clean look.
- For most adhesive types, a bead application along the edges of the cornice is effective. Consider a zig-zag pattern to ensure full coverage without overdoing it.
- If using polyurethane glue, remember it expands as it sets, so use it sparingly.
"Getting the adhesive right is akin to laying a strong foundation for a house. Without it, everything crumbles."
Installing Foam Cornices
Transitioning from preparation to the actual installation of foam cornices marks a significant step in enhancing a space's aesthetics. The methodical application of cornices not only accentuates the corners of a room but also creates a polished finish that ties together the overall design. Proper installation guarantees that the cornices fulfill their decorative purpose while also acting as practical elements that mask imperfections where walls meet.
Choosing foam cornices, as opposed to other materials, brings several benefits. They are lightweight, easy to handle, and often come ready to paint, minimizing the amount of prep work needed before installation. Understanding how to install them effectively ensures that you not only improve your room's visual appeal but also add value.
Methods for Positioning Cornices
Positioning foam cornices requires a mix of precision and creativity. Start by identifying the most visually attractive angles in your room, especially where two walls meet. It’s advisable to use a level to mark where the top of the cornice will sit. A steady hand and keen eye are your best friends here.
When positioning the cornice, rely on the following practical tips:
- Use a Mitre Box: This tool aids in cutting the foam at a precise angle, essential for creating clean joints. Don’t skimp on accuracy, as gaps could mar the visual harmony of the finished product.
- Trial Fit: Before adhering the cornices, it's wise to do a dry fit. Position them along the corner and adjust until they sit just right. This way, you can sidestep any potential mishaps during the actual installation.
- Employ Temporary Support: Depending on the height of the installation, using something to support the cornice temporarily could prove invaluable. A set of ladder or scaffolding might give you the leverage needed without strain on your back.
These steps will not only ensure proper alignment but also prevent errors that could lead to rework later.
Ensuring Level and Seamless Installation
Achieving a seamless appearance in foam cornice installation largely hinges on ensuring everything is level. The last thing you want is for your beautifully crafted cornices to appear askew or misaligned.
Here’s how to make sure your installation is spot-on:
- Leveling Tools: Use a laser level or a simple spirit level to check that the cornices are even across the room. This small detail may seem trivial but can dramatically alter the final visual.
- Adjust on the Fly: While positioning each piece, don’t hesitate to make minor adjustments to ensure everything aligns neatly. Foam is forgiving and easy to manipulate for slight shifts.
- Consider Cornice Profiles: Different cornice designs will have varying thicknesses. Be mindful of how they align not just with each other, but with the wall and ceiling surfaces. Inconsistencies here can lead to visible seams.
- Clean Cuts and Adhesion: As you apply adhesive, ensure it covers the entire back of the cornice uniformly. Gaps in adhesive can lead to sagging or even detachment later.
Remember, the mantra of any successful installation is this: measure twice, cut once. Don’t rush the process.
By following these careful steps, you ensure that your foam cornices not only improve the beauty of your space but do so in a way that speaks to meticulous craftsmanship.
Finishing Touches
Finishing touches are the cherry on top when installing foam ceiling cornices. They’re not just an aesthetic add-on; these steps can significantly enhance the overall appearance and longevity of the installation. It’s the difference between a DIY project that looks hastily done and one that genuinely elevates a space. Properly addressing these finishing touches ensures that every gap is filled, seams disappear into a seamless expanse, and your vision for the ceiling comes to life.
Filling Gaps and Seams
When you step back to admire your handiwork after installing foam cornices, any gaps or seams can be real eyesores. Filling these effectively is crucial for achieving a polished look. Using a flexible caulk specifically designed for foam is often a go-to solution.
- Choose the Right Caulk: Opt for a paintable latex or silicone caulk. This helps in the long run; it can expand and contract without cracking.
- Tools You'll Need: A caulking gun is the primary tool here. Pair it with a damp cloth for clean-ups.
- Application Technique: Squeeze a thin bead of caulk into any gaps, ensuring even coverage. Smooth it out with your finger or a caulk smoothing tool for a clean finish.
- Let it Cure: Patience pays off. Allow the caulk to dry thoroughly before touching up or painting.

By effectively filling gaps and seams, you set the stage for a seamless look that will impress anyone who steps foot into the room.
Painting and Decorating Options
Once the filling is complete, moving on to painting and decorating can truly elevate a room. Foam cornices can either be a subtle enhancement or a bold statement, depending on how they are treated.
- Choosing the Right Paint: Use a water-based acrylic paint. It adheres well to foam and is less likely to damage it.
- Color Scheme: Your color choices should reflect the overall décor of the room; think about a sophisticated white for a classic look or bold colors to make a statement.
- Finishing Types: Matte finishes are often preferred as they mask imperfections better than glossy finishes.
"A touch of paint can transform a simple foam cornice into a striking element of design."
- Decorative Techniques: Consider stenciling or light distressing for a personal touch. You might also want to add a touch of gold leaf or metallic paints to surface for a luxe finish.
Safety Considerations
When it comes to installing foam ceiling cornices, safety isn’t just a buzzword; it’s a fundamental aspect of the whole process. Engaging in any home improvement task involves certain risks, and working with materials, tools, and adhesives can expose you to potential hazards. Paying close attention to safety considerations can help minimize these risks, ensuring the project goes smoothly from start to finish.
The significance of prioritizing safety lies in preventing accidents that can cause serious injuries. Whether it's falling from height or inhaling fumes from adhesives, being aware of these threats is imperative. Furthermore, by following safety protocols and wearing the right protection, you assure an environment that's not only productive but also responsible.
Protective Gear and Tools
Having the right protective gear is non-negotiable. While foam cornices are relatively lightweight, the tools used in their installation—like saws and adhesives—can pose dangers if proper precautions aren’t taken. Here’s a quick checklist of essential protective gear:
- Safety goggles: Protect your eyes from debris while cutting or fastening.
- Dust mask: This is crucial when working with foam and potentially harmful adhesives. A mask helps keep those nasty particles at bay.
- Gloves: A pair of durable gloves will safeguard your hands from irritants and sharp surfaces.
- Knee pads: Trust me, your knees will thank you if you’ll be on the floor for extended periods.
Alongside these safety items, make sure the tools you choose are suitable for the task. A sharp utility knife, a reliable measuring tape, and a sturdy handsaw should do the trick for most projects. Having everything at your fingertips ensures that you won't have to scramble for tools mid-installation, increasing your chances of mishaps.
Ventilation and Safety Protocols
Ventilation is another critical factor that often gets overlooked. Working indoors, especially when using adhesives or paints, can lead to fumes becoming concentrated. It's advisable to ensure your workspace is well-ventilated to avoid inhaling harmful chemicals. Open windows, turn on fans, or even better, work outside whenever possible. Fresh air goes a long way in keeping you alert and ensuring a healthier working environment.
In addition, establishing protocols like keeping flammable materials away from work areas, maintaining an organized workspace, and continually assessing your surroundings can help keep accidents at bay. Following safety guidelines not only protects you during the installation process but also fosters a habit of mindfulness that improves all future projects.
"An ounce of prevention is worth a pound of cure."
Taking time to prepare and understand safety measures today will pay dividends in avoiding headaches down the road.
Common Mistakes to Avoid
Installing foam ceiling cornices isn’t a simple walk in the park; it requires some finesse and a pinch of painful knowledge. Ignoring crucial parts of the installation could not only result in an unsightly finish but also lead to future headaches. The task at hand may seem straightforward, but even seasoned DIY-ers stumble along the way. Therefore, being aware of common mistakes can save you time, effort, and perhaps a bit of your sanity. Knowing what to sidestep can set you up for a successful project, transforming your space instead of marring it with errors. Here are a couple of big pitfalls to keep an eye out for:
Overlooking Measurements
When you’re in the thick of setting up your foam cornices, it’s all too tempting to wing it with measurements. This might sound like a time-saving tactic, but oftentimes, it’s a one-way ticket to frustration. If your measurements are off by even a smidge, you’ll likely end up with awkward gaps or ill-fitting pieces.
- Double-check your numbers: Before cutting, measure twice. There’s an old saying in construction that rings true: "Measure twice, cut once." Believe me, it can save you from a lot of back-and-forth.
- Use proper tools: Rely on a tape measure or a laser measuring tool to ensure accuracy. Your phone’s camera just won’t cut it here.
- Consider your angles: Corners can be tricky, so take special care. A simple miter box can be a lifesaver for achieving those nice, clean angles when needed.
Remember, accuracy isn’t just a suggestion; it's a must.
In short, overlooking measurements often ripples into other aspects of installation, causing hassles that could have easily been avoided.
Choosing the Wrong Adhesive
Adhesive may not get the spotlight it deserves, but it plays a pivotal role in the stability of your cornices. Straying from the recommended adhesive can have disastrous implications. You might think any glue will do, but not all adhesives are made equal. The wrong product could make your cornices pop off like a bad piece of popcorn.
- Select suitable adhesive: Spend some time understanding what type of adhesive suits your foam cornices best. General construction glue might not offer the flexible hold you need.
- Testing before application: Before you commit, test the adhesive on a small, inconspicuous area. This allows you to see how it reacts with the material. You might be surprised at what works and what doesn’t.
- Avoid cheap options: While saving a buck is understandable, opting for lesser-known brands can lead to trouble down the line. Better to invest in something reliable rather than deal with corny cornices later.
Epilogue
As we wrap up this extensive exploration into the world of foam ceiling cornices, it’s essential to reflect on the significance of the insights shared. Installing these decorative pieces is not just about aesthetic upgrade; it's about enhancing the overall ambiance and character of a space. The intricacies covered in the previous sections elevate the reader's knowledge, equipping them with practical skills for successful installation.
In summary, the crucial components throughout this guide are the meticulous preparation, precise measuring, and careful adhesion strategies. Each of these aspects intertwines to create a seamless and harmonious finish that can dramatically alter your décor. Foam cornices offer lightweight yet durable solutions, presenting a canvas for creativity and design. One should appreciate that attention to detail—not only enhances the beauty but also ensures longevity.
Moreover, it's vital to recognize the common pitfalls one might encounter. Avoiding these mistakes, like miscalculating corner angles or using the wrong adhesive, can save time and resources, ultimately leading to a more refined result.
"A job well done often stems from understanding subtleties, whether in life or in craft."
Incorporating foam ceiling cornices into your home isn’t merely an effort in décor; it's about embracing craftsmanship. It’s a way to channel creativity and personalize your living space, making it truly yours.
