How to Install a Toilet Seat: A Comprehensive Guide


Intro
Installing a toilet seat may seem like a simple task, but proper execution requires careful attention to detail. Understanding the significance of a well-mounted toilet seat is essential for both functionality and hygiene. A correctly installed seat ensures stability and comfort, and it can prevent potential issues, such as wobbling or misalignment. This guide will provide a step-by-step approach to installing a toilet seat, making it accessible even for those who have little experience with DIY projects.
Before diving into the actual installation, it is essential to plan and gather the right information. This article outlines key elements, including tools needed, the preparation process, installation methods, and maintenance advice. The aim is to empower homeowners and DIY enthusiasts with the skills necessary to handle this project efficiently while ensuring safety and durability.
Understanding Toilet Seats
Understanding the various aspects of toilet seats is fundamental for anyone looking to install one. The toilet seat may seem like a trivial component, but its functionality and comfort significantly affect users' experiences. Hence, this section will explain the types of toilet seats, material considerations, and the importance of a proper installation.
Types of Toilet Seats
Toilet seats come in diverse forms, catering to different needs and preferences. Here are the primary types:
- Standard Toilet Seats: These are the most common and generally made of plastic or wood. They fit most toilets.
- Soft-Close Toilet Seats: Designed to prevent slamming, soft-close seats allow for a quieter closure. This feature enhances comfort and safety.
- Heated Toilet Seats: Often found in more luxurious settings, heated seats offer comfort in colder climates. They can be adjusted to suit preference.
- Bidet Toilet Seats: These seats come equipped with a bidet feature, offering enhanced hygiene. They spray water for cleaning, which can reduce toilet paper use.
- Elongated vs. Round Seats: Elongated seats are longer, providing more space and comfort. Round seats are more compact and often found in smaller bathrooms.
Selecting the right type of toilet seat is crucial. It not only should fit the toilet bowl but also must meet personal comfort preferences.
Material Considerations
The material of a toilet seat plays a role in durability and maintenance. Common materials include:
- Plastic: Often the least expensive, plastic toilet seats are lightweight and resistant to moisture. They are easy to clean but may lack the sturdiness of other materials.
- Wood: Wooden seats are more robust and offer a traditional aesthetic. However, they require more maintenance to prevent water damage and typically come at a higher price.
- Resin: This material offers a combined benefit of appearance and durability. Resin seats are resistant to chipping and cracking, making them a good long-term investment.
Each material has its pros and cons. If choosing a high-use bathroom, a more durable seat may be wise. For aesthetic, a wood or resin seat could serve better.
Why Proper Installation Matters
Proper installation of a toilet seat is essential for several reasons:
- Safety: A well-installed seat reduces the risk of accidents, such as slipping or instability, which can occur with loose fittings.
- Comfort: If a seat is aligned improperly, it can affect comfort significantly. A properly installed seat ensures even weight distribution and comfort during use.
- Longevity: Correct installation prolongs the lifespan of the toilet seat. Loose bolts or misalignment can lead to wear and tear, requiring earlier replacement.
Proper installation is not just about utility; it directly impacts daily comfort and safety in a home.
Incorporating these considerations lays the foundation for a successful toilet seat installation. Understanding the types, material choices, and implications of proper installation can help enhance the overall bathroom experience.
Preparing for Installation
Preparing adequately for the installation of a toilet seat can greatly influence the overall success and efficiency of the process. This preparatory phase sets the stage for a smooth installation experience, reducing the risk of complications later on. It involves a few essential steps, including gathering tools, ensuring cleanliness, and identifying the specific type of toilet seat. An organized preparation can save time, enhance safety, and ensure proper installation.


Gathering Required Tools
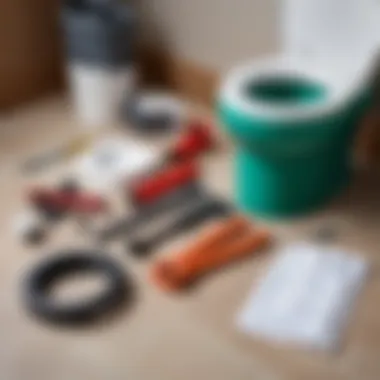
Before diving into the installation, it’s essential to collect the necessary tools. A well-prepared toolkit streamlines the process and minimizes interruptions. The basic tools required are:
- Screwdriver (both flathead and Phillips)
- Adjustable wrench
- Pliers
- Level
- Cleaning cloth or sponge
- Rags
Having all tools at hand prevents you from needing to search mid-installation and helps maintain a focused workflow. If you encounter issues or extra fixtures, consider having additional supplies ready. This proactive approach makes the process smoother and more efficient.
Cleaning the Toilet
Cleaning the toilet area before installation is not just about aesthetics. Debris, grime, or residue can interfere with the secure fitting of the new seat. A clean surface also helps to ensure hygiene since toilet seats are often the most frequently touched parts of a bathroom.
Start by using a disinfectant cleaner to thoroughly wipe down the toilet rim and the area around it. Pay particular attention to the mounting holes, as these are where the new seat will attach.
Key steps to effectively clean the toilet include:
- Remove existing toilet seat if applicable.
- Apply a toilet cleaner around the rim and let it sit for a few minutes.
- Scrub with a toilet brush to remove stubborn stains.
- Wipe down surfaces with disinfectant wipes or a cleaning cloth.
Identifying the Toilet Seat Type
Not all toilet seats are created equal. Understanding the type of seat you have is critical to selecting the right replacement. Toilet seats typically come in various sizes and shapes, including round and elongated models. Different toilet brands may have unique fitting mechanisms as well.
To determine the type, measure the toilet bowl from the back to the center of the front rim. This measurement will help identify whether you need a round or elongated seat. Furthermore, check how the seat attaches to the bowl. Some seats might use traditional bolts, while others may have quick-release mechanisms.
In summary, thorough preparation can significantly impact the installation outcome. Gathering the right tools, ensuring cleanliness, and correctly identifying the toilet seat type provide a foundation for success.
Step-by-Step Installation Process
The installation of a toilet seat is not just a task of convenience; it is an essential part of maintaining a proper bathroom environment. Proper installation ensures the seat functions effectively, remains stable, and enhances the overall user experience. Throughout this guide, we will explore each step involved in this process. By adhering to clear instructions, anyone can achieve a professional-level installation at home.
Removing the Old Toilet Seat
Before attaching the new toilet seat, you must carefully remove the old one. This step is crucial to prepare the toilet for the new seat. Start by checking under the seat for bolt caps. Most toilet seats have these caps to conceal the bolts. Use a flat screwdriver to pop off the caps gently. Once exposed, use a socket wrench to unscrew the nuts securing the bolts. If the bolts are rusted or difficult to turn, you might need penetrating oil to help. After removing the nuts, lift the old seat off carefully and discard it if necessary.
Aligning the New Seat
With the old seat removed, it's time to install the new one. Place the new seat on the toilet bowl, ensuring it is centered and aligned with the mounting holes. This alignment is vital for comfort and stability. Take a moment to adjust the position if necessary. It should not slide off easily, nor should there be any gaps between the seat and the bowl. Once you are satisfied with the alignment, proceed to the next step.
Securing the Bolts
Securing the toilet seat is the next critical step. Insert the provided bolts through the holes in the seat and into the toilet bowl. From underneath, place the washers and nuts on the bolts and tighten them. Careful attention is needed here: over-tightening may crack the ceramic bowl, while under-tightening can lead to instability. A snug fit is ideal. If you're unsure about the tightness, periodically check after usage in the following days to ensure the seat remains secure.


Adjusting the Seat Position
After securing the seat, it is essential to ensure proper positioning for comfort. A well-adjusted seat should be perpendicular to the bowl for effective use. Test the seat to see if it moves side to side. If so, you may need to adjust the bolts slightly until it sits perfectly. Additionally, check for any wobbling by gently pressing down on different areas of the seat. Any minor adjustments can save you from ongoing annoyance in the future.
"A well-installed toilet seat can improve the bathroom experience for all users. It's about functionality and comfort."
By following these step-by-step guidelines, you can install a toilet seat that not only looks good but also functions effectively. Taking your time during each step ensures that you address all potential issues before they arise.
Common Challenges and Solutions
Installing a toilet seat might seem simple, but several challenges can arise during the process. Understanding these issues and how to solve them can make the installation smoother and more efficient. This section addresses common problems that may occur, along with practical solutions. Recognizing these challenges beforehand can save time and prevent frustration.
Dealing with Stubborn Bolts
One of the first hurdles that homeowners often face is stubborn bolts that refuse to budge. Over time, bolts can corrode or become overtightened, making them difficult to remove. This can lead to unnecessary stress if not approached correctly.
To tackle this problem, it is advisable to apply a penetrating oil, such as WD-40, directly on the bolts. Allowing the oil to sit for about ten minutes often helps. If the bolts still do not turn, using a socket wrench or a pair of pliers may provide the necessary leverage.
In some cases, heat can be applied using a heat gun. The heat will expand the metal, potentially loosening the bond. However, care should be taken not to damage the surrounding materials. If all else fails, cutting the bolts with a hacksaw may be necessary but is definitely a last resort.
Addressing Misalignment Issues
Once the new toilet seat is installed, misalignment can become another challenge. A seat that does not sit evenly on the toilet can be uncomfortable and unstable. This misalignment often occurs from improper measurement during installation or insufficient adjustments afterward.
To verify alignment, check whether the seat is centered over the bowl. If not, simply loosen the bolts slightly and reposition the seat, making sure it is equidistant from the sides. Once adjusted, ensure to retighten the bolts, but avoid overtightening, which can cause damage.
If the misalignment persists, consider inspecting the toilet bowl itself. An out-of-level bowl can lead to continual issues. Using shims can help correct the angle, providing a stable foundation for the toilet seat.
Resolving Comfort Concerns
Comfort is a subjective aspect, but it significantly impacts user experience. If the toilet seat feels uncomfortable, it can deter regular use. Common complaints involve the seat being too hard, too cold, or poorly shaped.
For hard seats, soft-close options offer a thicker cushion for added comfort. These seats reduce pressure points, making sitting more pleasant. If temperature is a concern, heated toilet seats might be an excellent investment, especially in colder climates.
Moreover, ergonomic shapes are available that conform better to the body's natural form. This can reduce strain on the user’s body. Always consider trying different options before settled on one. Finding the right balance of comfort and functionality is crucial for a satisfactory installation.
"The quality of the toilet seat can significantly change the overall perception of the bathroom experience."
Post-Installation Care


Taking care of your newly installed toilet seat is essential for both longevity and hygiene. Proper post-installation care involves simple practices that ensure your toilet seat remains secure, clean, and comfortable. This section will explore various maintenance practices, vigilance on stability, and recognizing when a replacement is necessary.
Regular Maintenance Tips
Regular maintenance can prolong the life of your toilet seat and enhance user experience. Here are some key practices:
- Clean Regularly: Use mild cleaners to wipe down the seat and surrounding surfaces. Avoid abrasive materials that might scratch the finish.
- Check Hardware: Periodically examine the bolts and nuts to ensure they remain tight. Loose fittings can lead to instability and discomfort.
- Look for Wear and Tear: Inspect for any cracks or chips in the seat material. Address any damage promptly to ensure safety.
Adhering to these practices can prevent larger issues down the line.
Monitoring for Stability
Stability is crucial for functionality and safety. After you install the toilet seat, keep an eye on its performance by checking the following:
- Wobbling: If you notice any movement when sitting or standing, it could indicate loose fittings. Retighten them if necessary.
- Evenness: Ensure the seat sits evenly on the bowl. Misalignment can cause discomfort and lead to further issues over time.
- Feedback from Users: If others in your household report discomfort or wobbles, address these concerns promptly to ensure everyone's safety.
Making sure your toilet seat is stable can prevent unnecessary accidents and enhance its usability.
When to Replace a Toilet Seat
Even with diligent care, all toilet seats have a lifespan. Here are signs that indicate it might be time for a replacement:
- Visible Damage: Look for cracks, chips, or significant scratches that affect the seat's appearance or function.
- Stains and Odors: Persistent stains or unpleasant odors that do not respond to cleaning may signal irreparable wear.
- Wear in Hardware: Corroded or damaged bolts can compromise the seat's stability. It's usually more cost-effective to replace the entire seat than to repair hardware solvable issues.
Replacing a toilet seat at the right time can improve hygiene and comfort in your bathroom.
End
In the process of installing a toilet seat, understanding each phase of the task is vital. This final section emphasizes the importance of the steps we've discussed throughout the article. Proper installation not only ensures functionality but also promotes hygiene and comfort in the restroom. A securely installed toilet seat minimizes the risk of accidents and provides a stable unit for users.
Recap of Key Steps
To summarize, the journey from selecting the right toilet seat to the actual installation involves several key steps:
- Preparation: Gathering the right tools and cleaning the area prepares you for a successful installation.
- Removal: Carefully taking off the old seat sets a clean stage for the new one.
- Alignment: Aligning the new seat properly is crucial for comfort and usage.
- Securing the bolts: Bolts must be secured adequately to prevent movement.
- Adjustments: Final adjustments ensure the seat fits perfectly, enhancing user experience.
This sequence, when followed thoroughly, equips you for a successful result.
Encouragement for Future DIY Projects
Completing a task as practical as installing a toilet seat can inspire confidence in tackling other DIY projects. Each step of this process has practical applications in various home repair situations. As you grow more comfortable with tools and installations, consider exploring other areas, such as plumbing repairs or home design enhancements.
Getting your hands dirty can lead to personal satisfaction and save financial resources. Each successful project reinforces a valuable skill set that proves useful both in personal and professional contexts, particularly for designers and builders. Learning through experience will elevate your ability to solve larger, more complex issues as they arise in your home or work environment.
"The journey of a thousand steps begins with a single step." - Anonymous
As you consider your next projects, remember that every task contributes to your overall growth and efficiency as a DIY enthusiast.


