Constructing Thermal Insulated Concrete Around Your Home
Intro
Constructing a thermal insulated concrete perimeter around your home is not just a practical solution for many homeowners; it is a fundamental aspect of ensuring energy efficiency and moisture management. This task involves several steps that require careful planning, choice of materials, and execution.
In this guide, we will explore the intricacies of planning and designing your project, selecting appropriate materials, and methods to successfully complete the task. Everyone from DIY enthusiasts to professional builders can benefit from understanding these critical components.
Проектирование и планирование
When you decide to build a thermal insulated concrete perimeter, the first steps include careful design and planning. This phase is essential to ensure you avoid pitfalls during construction. Here are key considerations to keep in mind:
Как выбрать проект для DIY
Start with a clear design in mind. You may want to assess your current foundation and the dimensions of your home. Having a well-structured plan improves efficiency. One should consider both aesthetic and functional aspects while designing the perimeter. If you are inexperienced, simpler designs can help build your confidence.
Оценка времени и ресурсов
Next is evaluating the time and resources needed for the project. Creating a thermal insulated concrete perimeter is not a quick endeavor. Identify all necessary materials and tools, and consider how long it will take to complete the task. Making a list can help maintain focus and minimize interruptions during the process.
Estimate your working hours and plan accordingly, as some tasks may take more time than anticipated.
Выбор материалов
Choosing the right materials is critical for creating an effective insulated concrete perimeter. The choices you make will affect the longevity and efficiency of your project.
Типы материалов для различных проектов
When it comes to insulation, you can select from various options. Common materials include polystyrene, polyurethane, and mineral wool. Each has its unique advantages:
- Polystyrene: Great thermal performance and moisture resistance.
- Polyurethane: Offers superior insulation but can be more costly.
- Mineral Wool: Fire-resistant and sound-proofing properties.
Consider your local climate and building codes when selecting materials.
Советы по покупке и экономии
When shopping for your materials, research and compare prices from different suppliers. Often, buying in bulk can yield discounts. Look for local suppliers who may have excess inventory at lower prices. Always consider quality over cost. Using quality materials might initially seem expensive but can save you from future repairs or replacements.
Availability of simulators or software to help you estimate your material needs can be beneficial.
Intro to Concrete Perimeter Construction
Constructing a thermal insulated concrete perimeter is an essential aspect of modern home building and renovation. It not only contributes to the structural integrity of the home but also plays a vital role in energy efficiency and comfort. A well-constructed perimeter helps to control moisture, regulate temperature, and prevent heat loss which ultimately leads to reduced energy costs. In regions with extreme weather conditions, this construction style becomes even more relevant, as it effectively shields the home from fluctuating temperatures.
The process involves several critical steps and considerations, each of which impacts the outcome significantly. Proper planning and execution in this area can enhance the durability of the structure and the quality of life for its inhabitants. Understanding how to integrate thermal insulation within the concrete perimeter will provide homeowners with long-term savings and improve the overall living environment.
Understanding the Purpose of a Concrete Perimeter
The concrete perimeter serves multiple purposes beyond mere physical boundaries. Its primary roles include:
- Structural Support: It provides a solid foundation that supports the weight of the building. This is particularly important in areas prone to shifting soil or natural disasters.
- Moisture Control: The perimeter aids in preventing water intrusion. Properly constructed, it keeps excess moisture away from the foundation, decreasing the risk of mold and structural damage.
- Thermal Regulation: Insulating properties of the perimeter help maintain stable indoor temperatures. This is crucial for energy conservation.
Overall, every homeowner should recognize the importance of a well-designed concrete perimeter, as it is integral to the overall health of the home.
Exploring the Benefits of Thermal Insulation
Thermal insulation within the concrete perimeter offers various benefits that are both immediate and long-lasting. Some of its key advantages include:
- Reduced Energy Bills: With effective insulation, the amount of energy required for heating and cooling decreases, resulting in significant savings on utility costs.
- Enhanced Comfort: Homes built with insulated perimeters maintain consistent temperatures, reducing cold drafts and hot spots, thus improving overall comfort.
- Environmental Impact: Using less energy to heat or cool a home reduces carbon footprints, contributing to environmental sustainability.
- Noise Reduction: Insulation materials can also absorb sound, leading to quieter homes, which is often overlooked in construction considerations.
In summary, constructing a thermal insulated concrete perimeter not only supports physical structure but also enhances energy efficiency and comfort in residential living.
Assessing Site Conditions
Assessing site conditions is an essential step in the construction of a thermal insulated concrete perimeter around your home. This process involves a thorough examination of both the soil type and the local climate. Understanding these two factors will not only ensure the stability of your construction but also enhance its effectiveness in managing heat transfer and moisture control.
Evaluating Soil Types and Drainage
The first aspect of assessing site conditions is evaluating the soil types and their drainage capabilities. Soil varies widely in composition, structure, and drainage properties. Knowing your soil type is crucial because it influences the durability of your concrete perimeter.
Different soil types, such as clay, sand, or silt, each have distinct characteristics. For example:
- Clay soils tend to retain water, leading to potential expansion and contraction, which can compromise the integrity of your concrete.
- Sandy soils, on the other hand, allow for good drainage but may not provide the necessary support when wet.
Consider conducting a soil test if you are unsure of your soil type. This can help you determine if additional measures like drainage systems are needed. Good drainage is essential to prevent water accumulation, which can lead to deterioration of insulation materials and the concrete structure itself.
"Understanding soil conditions helps in planning effective drainage strategies and choosing appropriate materials for construction."
Identifying Local Climate Factors
The second element to consider is identifying local climate factors. Climate significantly impacts how your thermal insulated concrete perimeter will perform. Variations in temperature, humidity, and precipitation can affect both the selection of materials and the construction process.
Factors to evaluate include:
- Temperature fluctuations: Extreme temperature variations can cause expansion and contraction in concrete. Consider choosing materials that can tolerate these changes without cracking or losing insulation properties.
- Humidity levels: High humidity requires careful moisture management. This may affect your choice of insulation material as some absorb moisture and lose their effectiveness.
- Precipitation: Areas with frequent rain or snow require robust drainage solutions. Ensure that your perimeter is elevated enough to reduce the risk of water pooling around the foundation.
By thoroughly assessing site conditions, you will create a solid foundation for your project. This will not only enhance the lifespan of your construction but also improve energy efficiency in your home.
Planning and Design Considerations
Proper planning is essential when constructing a thermal insulated concrete perimeter. This phase sets the foundation for success, influencing both the structural integrity and efficiency of insulation. A carefully thought-out design can provide long-term benefits, including energy savings and moisture control. Homeowners must take into account various specifications, dimensions, and site factors before moving forward. This ensures that the insulation functions optimally and fits well with existing structures and landscaping.
Dimensions and Specifications
Choosing the right dimensions and specifications is crucial for achieving a functional insulated concrete perimeter. Consider factors such as the depth and width of the concrete walls. Depth typically ranges from 12 to 18 inches, while width can vary based on local regulations and structural needs. Additionally, the thickness of the insulation material should be determined to maximize thermal performance.
Homeowners often overlook the importance of including proper drainage systems within their design. Installing drain tiles and ensuring sloping away from your home can prevent water accumulation. Proper dimensions will also support the weight of the concrete and insulation without leading to cracks or structural failures.
Some key aspects of dimensions and specifications include:
- Concrete Thickness: Generally, a 4-inch thick wall is standard, but local factors may suggest otherwise.
- Insulation Thickness: A minimum of 2 inches is recommended for effective thermal insulation.
- Overall Height: Height should align with the building code and existing landscape features.
By keeping these factors in mind, you can ensure that your concrete perimeter serves its purpose effectively.
Visualizing Your Project with Diagrams
Visual representation through diagrams is an instrumental part of the planning process. Creating detailed sketches allows you to visualize and adjust your project before its physical execution. Diagrams should include all important elements like dimensions, insulation layers, and unique site conditions.
Including variance in design is beneficial, especially when accounting for local climate factors and soil conditions. For example, if you're dealing with clay soil, your diagram should reflect how that soil's drainage patterns will interact with your concrete perimeter.
The use of visual aids has several advantages:
- Easier Communication: A diagram can help convey ideas clearly to contractors or stakeholders.
- Identifying Potential Issues: Visuals can help you spot possible construction challenges before they happen.
- Budgeting and Planning: By outlining all the components, you can better estimate costs and the time required to complete your project.
"A well-prepared plan minimizes uncertainties and enhances the entire construction experience."
Selecting Materials
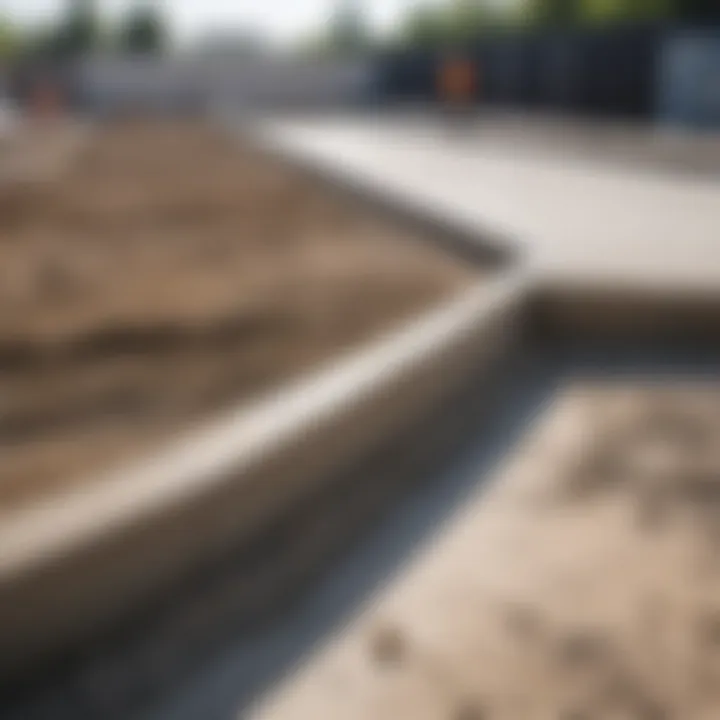
Selecting the right materials is crucial for constructing a thermal insulated concrete perimeter around your home. The quality and type of materials used can significantly impact insulation performance, the structural integrity of the perimeter, and the durability of the installation. This section outlines key elements in choosing the appropriate insulation material and concrete mix options.
Choosing the Right Insulation Material
Insulation is the backbone of energy efficiency in any construction project. When selecting insulation, consider factors such as R-value, moisture resistance, and environmental impact.
- R-value: This indicates the insulation's ability to resist heat flow. Higher R-values correlate with better insulation. For residential construction, a minimum R-value of 20 is typically recommended, although it can vary with climate.
- Moisture Resistance: Insulation should be able to withstand local moisture conditions without degrading. For example, extruded polystyrene is more moisture resistant compared to fiberglass.
- Environmental Impact: Consider materials that are eco-friendly. Materials such as cellulose or sheep's wool have lower environmental footprints compared to synthetic alternatives.
In addition to these factors, consider local regulations or building codes regarding insulation. These can dictate minimum standards or recommended products that are suitable for your area.
Understanding Concrete Mix Options
Choosing the right concrete mix is an essential part of constructing a thermal insulated concrete perimeter. Various mixtures serve different purposes, and understanding these can lead to successful construction outcomes.
- Standard Mix: A common choice for typical applications. It generally includes cement, sand, gravel, and water. The strength and durability are important aspects, and a mix with a ratio of 1:2:3 (cement:sand:gravel) is common for robust foundations.
- High-Performance Mix: This type is tailored for specific applications requiring extra strength, such as in areas with high load-bearing needs or specific environmental conditions. It may include additives to enhance performance and longevity.
- Self-Consolidating Concrete: This mix flows easily to fill forms and will settle under its weight. It is advantageous for intricate designs and detailed work within the perimeter.
When opting for concrete, ensure the mix is appropriate for the insulation system you are implementing. Compatibility between insulation and concrete is vital to ensure the entire structure works efficiently to enhance thermal performance.
"Selecting appropriate materials is not just about cost; it's about ensuring the longevity and effectiveness of your construction project."
Step-by-Step Construction Process
Constructing a thermal insulated concrete perimeter around a home is not merely about placing equipment and materials together; it requires careful planning and execution. The step-by-step construction process is crucial to ensure structural integrity, energy efficiency, and long-term durability of the insulation system. Proper practices in each step minimize mistakes and future issues.
Preparing the Site
Preparing the site involves assessing the area where the concrete perimeter will be placed. The ground must be cleared of debris, vegetation, and any old materials that could compromise the new installation. Check for levelness and accessibility. Use stakes and strings to mark the perimeter's outline. This preparatory step is critical as it sets a solid foundation for all subsequent phases. Also, be sure to account for local building codes and property lines as these can affect the design and placement of your perimeter.
Excavation Guidelines
Excavation is the next logical step and involves digging out a trench that will accommodate the concrete. The depth and width of this trench depend on your local building codes and the specific design of your insulation system. It is essential to ensure that the trench is deep enough to allow for proper insulation without compromising the stability of the structure.
Consider using a level to ensure that the base of the trench is even. Uneven surfaces during pouring can lead to weak spots in the concrete, which affect overall performance. Always allow for drainage at the bottom of the trench to prevent water pooling, which can lead to frost heave and other problems.
Building the Formwork
Building the formwork accurately is key. The formwork will hold the concrete until it sets, therefore it must be sturdy enough to withstand the pressure. Use plywood or similar materials to create forms that match your desired dimensions. Ensure that the corners are secured tightly to avoid any leaks of concrete.
Proper formwork is essential to achieving the desired shape and strength of the perimeter.
Double-check the alignment with a level before pouring concrete. It’s important to remember that the formwork should allow for necessary spacing for insulation material after the concrete cure.
Mixing and Pouring Concrete
The mixing ratio for your concrete is vital. Typically a strong mix is around one part cement, two parts sand, and three parts gravel, along with adequate water to ensure the mix is workable. Once you have mixed your concrete, pour it into the formwork. Pouring must be even and steady to avoid creating air pockets, which can weaken the structure.
Watch for workability throughout the process; the concrete should flow easily without being too watery. After pouring, use a screed to level the surface. This is where you remove any excess and ensure that it is smooth.
Incorporating Insulation
After the concrete has been poured and set, it's time to incorporate insulation. Depending on your choice of material, you must ensure that it fits snugly against the concrete to reduce thermal bridging. Common types of insulation used include rigid foam boards or spray foam insulation. Both types require careful selection based on the climate and specific site conditions.
Ensure that the insulation boards are secured and any gaps are filled to maintain continuity in the thermal barrier. This step is crucial as it greatly influences the overall energy efficiency of the home. Proper insulation will significantly lower energy costs and enhance comfort.
By following this outlined step-by-step construction process, you can properly construct a thermal insulated concrete perimeter that meets your home's needs.
Curing and Finishing Techniques
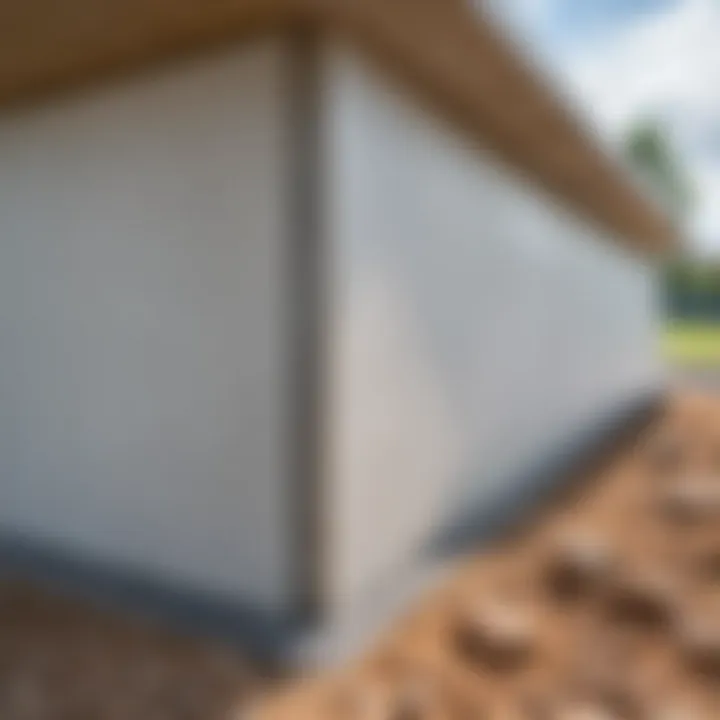
Curing and finishing techniques play a vital role in the overall durability and aesthetics of a thermal insulated concrete perimeter. Curing ensures that the concrete achieves its designed strength and performance by maintaining adequate moisture and temperature during the curing period. On the other hand, finishing touches contribute to the visual appeal and functionality of the perimeter. An understanding of effective curing methods and the art of finishing can elevate the integrity and longevity of the project, allowing homeowners to feel assured about their investment.
Understanding the Curing Process
Curing involves maintaining moisture in freshly poured concrete for a specific period. The primary goal is to promote proper hydration of the cement particles, which in turn strengthens the concrete. Effective curing also minimizes issues such as cracking and shrinkage over time.
The curing process typically lasts for at least seven days, although factors such as temperature and humidity can influence this duration. Here are a few common methods of curing concrete:
- Water Curing: Involves keeping the surface damp using methods like soaking the surface with water, or employing wet burlap.
- Plastic Sheeting: Covering the concrete with plastic sheets helps retain moisture while preventing evaporation.
- Curing Compounds: Special compounds can be sprayed on the surface to form a film that locks in moisture.
The choice of curing method often depends on the environmental conditions and project requirements. It is also crucial to note that initial curing begins immediately after pouring. The first few hours are critical to the success of the entire process. Thus, ensure that proper curing starts as soon as the finishing operations are complete.
Final Touches and Aesthetic Considerations
Once the curing process is well underway, it is time to focus on the finishing elements that bring the project to life. A well-finished concrete perimeter not only contributes to its durability but can also enhance the property’s value. Here are some key considerations for adding those final touches:
- Surface Treatment: Decide whether you desire a smooth or textured finish. Techniques such as troweling or broom finishing can yield different textures and appearances.
- Control Joints: Implementing control joints is essential for managing potential cracking. These joints should be placed at regular intervals to allow for natural movement.
- Color and Sealing: If desired, consider using pigments or color hardeners to enrich the concrete color. Additionally, applying a sealant protects the perimeter from the elements while enhancing the surface's appearance.
Pay attention to these aesthetic details because they can make a substantial difference in how the insulated perimeter integrates with the overall design of your home.
"The finishing process is not just about looks; it also profoundly affects the performance and lifespan of your concrete."
In summary, effective curing and thoughtful finishing techniques are essential for constructing a thermal insulated concrete perimeter that meets both functional and aesthetic standards. By approaching each stage with careful consideration, homeowners can ensure their project stands strong for years to come.
Maintenance and Troubleshooting
Maintenance and troubleshooting are critical when it comes to constructing a thermal insulated concrete perimeter around your home. A well-constructed foundation is not just about proper installation but also about ongoing care and attention. If issues arise and are not addressed timely, they can compromise insulation effectiveness and the durability of the structure.
Routine maintenance ensures that your perimeter retains its thermal properties. Regular checks can identify potential threats like moisture penetration or structural damage. Addressing these concerns early can prevent significant repair costs in the future. Incorporating a maintenance plan can extend the lifespan of your concrete perimeter and keep it performing optimally.
Regular Inspection Techniques
Regular inspections form the backbone of an effective maintenance strategy. Homeowners should inspect their concrete perimeter at least once a year and after heavy rain or snowfall. Here are some key techniques to conduct efficient inspections:
- Visual Check: Look for visible cracks in the concrete and any signs of chipping. Small cracks can lead to larger problems over time.
- Moisture Indicators: Check for any damp spots around the perimeter. Using a moisture meter can provide a more accurate reading.
- Drainage Assessment: Ensure that water drains away from the foundation rather than pooling near it. This can help prevent moisture-related issues.
- Insulation Inspection: If accessible, examine insulation materials for wear or damage. Ensure there is no separation from the concrete or other materials.
Common Issues and Solutions
Despite best efforts, common issues may arise with thermal insulated concrete perimeters. Knowing how to recognize and address these can save time and resources. Here are some typical problems:
- Cracking: Cracks may develop due to soil settlement or temperature changes. Solution: For small cracks, use a concrete sealant. For larger cracks, professional evaluation might be necessary.
- Moisture Intrusion: Excess water can lead to mold and degradation of materials. Solution: Ensure your drainage system is functional. Adding drainage tiles might also be beneficial.
- Insulation Damage: Insulation can degrade or become ineffective over time. Solution: Inspect insulation periodically. Replace any damaged sections to maintain thermal efficiency.
It's vital to remember that consistent attention will enhance the longevity and performance of your thermal insulated concrete perimeter.
By following these maintenance and troubleshooting guidelines, homeowners can ensure that their investments remain secure and functional. This proactive management not only preserves the integrity of the concrete structure but also significantly improves energy efficiency in the home.
Culmination and Takeaways
The construction of a thermal insulated concrete perimeter around your home is a significant endeavor that merits careful consideration. This article has illuminated various facets of the topic, ensuring that readers grasp the methodologies involved in creating a robust and efficient perimeter. The importance of proper construction cannot be overstated. A well-built insulated barrier not only enhances the structural integrity of a residential property but also plays a crucial role in energy efficiency and comfort.
In today's context, where energy costs are continuously rising, such insulation provides an effective means to reduce heating and cooling expenses. Moreover, preventing moisture infiltration through a properly insulated perimeter safeguards the home against potential structural damage and health risks associated with mold and mildew. Therefore, homeowners and builders should prioritize this aspect of construction.
Summarizing Key Points
- Purpose of Thermal Insulation: A thermal insulated concrete perimeter helps maintain stable indoor temperatures. It serves as a protective barrier against external environmental conditions.
- Moisture Control: Effective moisture management is a central theme throughout the construction steps. Without it, the quality of the home can suffer over time.
- Materials and Techniques: Familiarity with suitable insulation materials and concrete options is vital. The right choices can lead to enhanced performance and longevity.
- Regular Maintenance: After the construction process, attention to periodic inspections is needed. Addressing minor issues promptly can avert larger concerns down the line.
Encouraging Future Projects
Embarking on a project like constructing a thermal insulated concrete perimeter fosters not only personal skill development but also contributes to a broader movement toward sustainable living. Homeowners and builders are encouraged to consider similar projects that promote energy efficiency in their residences. The knowledge gained from this undertaking can serve as a foundation for further enhancements, such as integrating energy-efficient windows or exploring renewable energy options.
Even for those inexperienced in construction, with proper planning and the guidelines delineated in this article, it is conceivable to undertake such projects confidently. Each build enhances both residence and the surrounding community's eco-friendliness.
By focusing on thermal insulation, you invest not just in your home but in the future of energy sustainability.


