Mastering the Art of Painting Kitchen Facades

Проектирование и планирование
When it comes to painting kitchen facades that are enveloped in film, the first step you ought to take is thorough planning and design. This not only sets the groundwork for the project but ensures you're ready for whatever the task throws your way. The right prep work can make a world of difference, especially considering that kitchen environments can be unique and sometimes challenging to navigate.
Как выбрать проект для DIY
Choosing the right project is akin to picking the right tool for the job. Start by evaluating your kitchen's current appearance and what changes you envision. Are you going for a modern vibe, or do you want to maintain that classic look? This will guide your color choice and finish type. Don’t forget to take into account how much light the space gets. A dark room will require lighter shades to avoid making it feel cramped.
- Consider durability: Kitchen facades undergo daily wear and tear. Select a color that not only fits your aesthetic but is also practical—for instance, darker colors can show less dirt, while lighter shades can brighten the room.
- Visualize your options: Sometimes visual aids, like mood boards, can be helpful. Use online design tools or apps to experiment with different colors and finishes before making a commitment.
Оценка времени и ресурсов
Now that you have a design concept, it’s essential to assess the time and resources you will need. Here’s a checklist to help streamline your process:
- Timeframe: Consider how long you can allocate to this project. A quick weekend refresh might be feasible for minor adjustments, while a complete overhaul could take a week or even longer.
- Resources: Beyond paint, think about tools and materials such as brushes, rollers, and possibly new hardware. Make a detailed list and check what you already have at home; this often saves you time and money.
- Budget: Don’t overlook the financial aspect. Paint can vary greatly in price depending on quality and brand. Set a budget that reflects not just the paint but all additional materials needed.
"Every artist was first an amateur" - Ralph Waldo Emerson
Having a clear budget and project timeline helps manage expectations and ensures that there are no unpleasant surprises as you dive into your painting endeavor.
Выбор материалов
The next step involves selecting the right materials. The surface of kitchen facades covered in film can dictate what type of paint and tools you'll use.
Типы материалов для различных проектов
Different projects call for different materials. Here’s a broad overview:
- Acrylic latex paints: These are often favored for their ease of application and cleanup. They bond well to most surfaces, making them a logical choice for kitchen facades.
- Oil-based paints: Known for their durability and glossy finish, but they come with a strong odor and take longer to dry. They are best suited for surfaces that are less prone to dirt and grease.
- Specialty films: Some projects might call for adhesive films designed for surfaces like cabinets. These can offer a slick finish and are often more resistant to damage.
Со�веты по покупке и экономии
When it comes to purchasing materials, smart shopping can save you a pretty penny:
- Buy in bulk: If your project involves a large area, consider purchasing larger quantities of paint to reduce costs.
- Coupons and discounts: Always keep an eye out for sales or coupons. Local hardware stores often run promotions, especially during holiday seasons.
- Quality matters: While it may be tempting to go for the cheapest option, investing in higher-quality paint and tools often pays off long-term in terms of durability and finish.
Understanding Kitchen Facades and Film Materials
When diving into the world of interior design and renovations, understanding kitchen facades becomes a cornerstone of any worthwhile project. Kitchen facades, which serve as the visible front of cabinets and drawers, are often the first thing one notices when stepping into a kitchen. They greatly influence the overall aesthetics and functionality of the space.
In this section, we will explore various aspects related to these fronts, particularly those made from film materials. It’s essential to grasp the unique qualities and characteristics of these materials to make informed choices, enhancing both beauty and durability in your kitchen's design.
Types of Kitchen Facades
Kitchen facades come in an array of materials, each offering distinct benefits and visual appeal. Common types include:
- Wood: A classic choice, wood facades imbue a kitchen with warmth and charm.
- Laminate: A versatile and cost-effective option, laminate can mimic the look of wood, stone, or even metal varieties, suitable for various styles.
- Glass: Modern and sleek, glass facades allow for a sense of openness, making kitchens feel larger.
- Film Covered: These facades feature a substrate like MDF or particleboard covered with a vinyl film, popular for its affordability and ease of maintenance.
The selection of facades is paramount, as it impacts both the kitchen's style and its longevity. Factors such as budget, desired appearance, and how frequently you use the space should guide your decision.
Characteristics of Film Materials
Film materials, particularly in the context of kitchen facades, offer specific characteristics that set them apart from other materials. Notably:
- Durability: Film coverings are designed to withstand daily wear and tear, making them suitable for high-traffic areas.
- Variety of Styles: Available in myriad finishes, film can imitate natural wood grains, solid colors, or even textured surfaces.
- Water Resistance: A well-applied film can be moisture resistant, helping to ward off damage from spills, which is a plus in kitchens.
- Ease of Cleaning: A smooth film surface allows for easy wiping and upkeep, so it's not only about looks but also functionality.
These attributes mean that film materials are a practical choice for anyone looking to refresh their kitchen without the hefty expense often associated with high-end materials.


Advantages and Disadvantages of Film Facades
No material is without its pros and cons. Film facades are no exception, providing both advantages and certain limitations:
Advantages:
- Affordable: Film-covered facades are generally less expensive than solid wood or some high-end laminates.
- Lightweight: This type of facade is often lighter, making installation less cumbersome.
- Low Maintenance: With easy cleaning routines, they don’t require frequent upkeep that some natural materials may need.
- Customization: It’s easier to find the exact color or pattern you want with film than with other materials.
Disadvantages:
- Less Scratches Resistance: While durable, film surfaces can be more susceptible to scratches than other hard materials like wood or metal.
- Potential for Peeling: If not properly installed, edges can lift or film may peel over time, leading to a need for repairs.
- Limited Lifespan: While they are generally durable, they may not have the same longevity as solid wood or more robust options.
Preparation for Painting Film Facades
In tackling the task of painting kitchen facades wrapped in film, preparation plays a pivotal role. It sets the stage for a successful outcome, ensuring that each layer adheres properly and withstands daily wear and tear. Skipping or rushing through these initial steps can lead to poor results, ultimately costing time and resources. A well-prepared facade not only looks appealing but also retains its finish over time, offering more value and satisfaction to those who invest their effort.
Choosing the Right Location
Selecting an appropriate location for your painting project is crucial. Ideally, you want a space that is well-ventilated to facilitate quicker drying times while keeping fumes at a minimum. If you can work outdoors without risks of weather disruptions, that would be your best bet. Keep an eye on factors like temperatures and humidity; too much moisture can interfere with the paint adhesion. It’s a good idea to avoid direct sunlight, as it can cause the paint to dry too fast, leading to uneven coverage. If working indoors is your only option, ensure all windows are open and fans are running to circulate air.
Gathering Necessary Supplies
Before diving into the actual painting, gather all the necessary supplies to avoid running around mid-project. You’ll typically need the following items:
- Quality paint suited for film facades
- Primer designed for plastic surfaces
- Roller and brushes in various sizes
- Drop cloths or old newspapers to protect surfaces
- Painter's tape for clean lines
- Sandpaper for surface prepping
- Cleaning solution to degrease the area
Having everything within arm’s reach will keep interruptions at bay, allowing you to focus on the task without losing momentum.
Cleaning and Preparing the Surface
Cleaning the surface of your kitchen facade is not just a suggestion, it's a must. Begin by removing any dust, grease, or grime that may have accumulated over time. A simple solution of water and mild detergent often does the trick. Once wiped down, ensure the surface is completely dry before proceeding. If the existing finish is shiny or glossy, don’t forget to lightly sand it to give the new paint a way to grip; otherwise, you might end up with peeling paint sooner than you’d like.
Consider using a multitool or a scraper for any stubborn spots. Thorough prep will save you headaches down the line.
Priming the Facades
Priming is an essential yet sometimes overlooked step. A primer creates a solid foundation for the paint, enhancing adhesion and providing a uniform surface. When working with film materials, opt for a primer that specifies its compatibility with plastics or similar surfaces. It's like laying groundwork before building a house; without it, you're setting the stage for disappointment. Apply a thin, even layer, and allow it to dry fully as per the manufacturer's guidance.
Take note: it’s better to apply two thin coats of primer than one thick coat. This ensures a smoother finish and less risk of drips.
"Preparation is the key to success; neglecting it is the road to failure."
Motivation lies in seeing this project through to a professional-looking finish. Remember, each careful step you take in preparation mirrors the diligence you hope to achieve in your final product.
Selecting the Right Paint
Choosing the right paint is crucial when you're working with kitchen facades made of film. It’s not just about picking a pretty color, but also ensuring that the paint adheres well, withstands the kitchen environment, and maintains its finish over time. The kitchen is often a hub of activity, filled with heat, moisture, and various odors. As such, the paint you select must be durable and provide a protective barrier against these elements.
Careful consideration of paint type, finish, and color can ultimately determine the success of your project. Let's delve deeper into these factors.
Types of Paint Suitable for Film
When it comes to painting film-covered facades, the type of paint you choose makes a significant difference. Here are the most suitable options:
- Acrylic Paint: This is a water-based option that's free of harmful solvents. It offers flexibility and excellent adhesion to the film, which is crucial since film surfaces can be tricky. It's also quite easy to clean up and low in odor.
- Latex Paint: Similar to acrylic, latex paint provides a smooth finish and is similar in application. However, it’s essential to check that it contains a strong adhesive component, as standard latex formulations may not stick as well on film surfaces.
- Enamel Paint: For a hard and glossy finish, enamel paint is an excellent choice. It can resist stains and withstand the wear and tear typical in a kitchen setting. However, ensure it’s compatible with the film to avoid any peeling.
Each type of paint has its nuances, so understanding their properties in relation to your film façade is key.

Understanding Paint Finishes
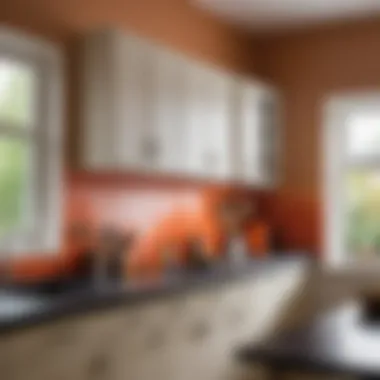
The finish you choose also plays a significant role in the appearance and functionality of your painted surfaces. In essence, it dictates how light reflects off your surfaces. Here are common finishes to consider:
- Matte Finish: Lacks sheen and is good at hiding imperfections. However, it might not stand the test of time in a kitchen's humidity and can be tricky to clean over time.
- Eggshell Finish: Slightly glossy, making it more durable than matte. It's easier to clean and holds up well in common kitchen stresses.
- Satin and Semi-Gloss Finishes: Both provide a greater sheen and are exceptionally resilient against stains and moisture. They shine brighter but may highlight imperfections.
Choosing the right finish not only enhances aesthetics but also informs how often you'll need to clean or repaint the surface.
Color Selection Considerations
Color can make or break the kitchen's overall vibe. When selecting a color for your film-adorned kitchen facades, take the following into account:
- Light Reflection: Lighter shades can make your kitchen feel more spacious and airy, while darker tones can create a cozier, intimate atmosphere.
- Complementing Styles: Whether your kitchen is modern or traditional, the color should match the decor. Consider adding hints of the same color in accessories or decor to establish cohesion.
- Longevity: Choosing a trendy color might seem appealing, but consider how often you want to repaint. Some choices, while fashionable, can date quickly.
- Mood Impact: Colors evoke different feelings. For example, a calming blue can create a relaxed atmosphere, while vibrant reds may stimulate appetite.
Literally, selecting the right paint is a balancing act. It involves weighing aesthetics, functionality, and personal style to achieve the best outcome for your minimally changed kitchen facades.
Painting Techniques for Film Facades
When it comes to painting kitchen facades made of film, employing the right techniques can spell the difference between a professional-looking finish and a botched job. This part of the guide delves into the essential methods of application, aimed especially at those who might not be professionals but have the ambition to elevate their DIY skills. Adopting the right technique can help make the painting process smoother, and can reduce the chances of uneven surfaces or peeling paint in the future.
Brush vs. Roller Application
Understanding the tools of the trade is crucial for anyone looking to tackle painting film facades. When it comes to applying paint, there are two primary application methods – brushing and rolling. Each method has its pros and cons.
Using a brush allows for more precision, making it easier to tackle intricate designs or edges. It tends to be better for touch-ups as well. However, this method can be more time-consuming and labor-intensive.
On the other hand, a roller application generally covers larger areas more quickly, which is helpful for flat surfaces, like paneling commonly found in kitchens. Paint rollers often provide a smoother finish, reducing the appearance of brush strokes, but they may not reach tight corners as effectively.
Here’s a simple breakdown:
- Brush Application:
- Roller Application:
- Pros: Precision, good for detail work, excellent for touch-ups.
- Cons: Time-consuming, potentially uneven coverage if not done carefully.
- Pros: Fast coverage, smooth finish, efficient for broad areas.
- Cons: May struggle with corners or intricate designs.
Tips for Even Coating
Achieving an even coating is vital for the overall look of your painted kitchen facade. It’s not just about slapping on paint and calling it a day. Here are several pointers to ensure satisfaction with your final results:
- Quality Materials: Make sure you invest in quality paint and tools. Cheap brushes or rollers can leave you with disappointing results.
- Right Technique: If you’re using a brush, use long, smooth strokes in one direction. For a roller, work in sections to blend each application.
- Thin Layers: Avoid the urge to load your brush or roller too heavily. Applying thin, even layers is key. This helps reduce drips and achieves better adherence.
- Maintain Wet Edges: Always keep a wet edge while painting. This prevents lines or patches from forming as you move from one area to the next.
- Light Conditions: Pick a time to paint when the lighting in your workspace is optimal, allowing you to see flaws or uneven spots more readily.
"An even coat not only looks better but also ensures the longevity of your work, preventing peeling and fading over time."
Managing Drying Times
Another crucial aspect of painting film facades is managing drying times properly. Rushing the process can lead to messy results and miserable maintenance in the future. Here are a few strategies to keep in mind:
- Follow Manufacturer’s Recommendations: Always refer to the paint can for specific drying times. Different paints have different requirements, and adhering to these will save you headaches.
- Humidity and Temperature: The drying process is affected heavily by surrounding conditions. Painting during high humidity or cold temperatures can prolong drying times and lead to improper curing.
- Test for Touch-Dryness: Before adding another coat, gently touch a concealed section to ensure it’s truly dry. If it feels tacky or leaves a mark, give it more time.
- Patience is Key: If possible, allow for extra drying time between coats compared to what the label suggests. The more patient you are, the better the finish you will achieve.
No matter how eager you are to see the final result, proper drying is a lynchpin in the painting process. In the long run, taking the time to do this right will pay off with a beautiful, durable kitchen facade.
Avoiding Common Pitfalls
When you embark on the project of painting kitchen facades made of film, it’s essential to tread carefully. Many who delve into DIY painting don’t realize how certain missteps can culminate in lackluster results or, worse, damage the surface itself. By understanding and avoiding common pitfalls, you set yourself on a path to achieving a flawless look that not only enhances your kitchen's aesthetic but also prolongs the longevity of your work.
Identifying Potential Challenges

Many obstacles can arise during the painting process, especially when dealing with film materials. The key is to recognize them early on. Here are a few challenges you might encounter:
- Surface Preparation: If the surface isn’t properly cleaned or primed, paint adhesion may falter. You may find bubbles forming or sections peeling off unexpectedly.
- Weather Conditions: Humidity and temperature can have a notable impact on drying times. Too much moisture can lead to issues like blistering.
- Incompatible Paint Types: Not all paints are designed for film-facade applications. Using the wrong type can result in poor coverage or flaking.
- Poor Applying Techniques: Overlapping when rolling or brushing can create streaks, leading to an uneven finish.
Addressing these factors beforehand will give you a solid head start.
Solutions to Frequent Issues
Once you've identified the potential challenges, it’s imperative to know how to tackle them effectively. Here are strategies to handle common issues:
- Surface Preparation: Always clean the surfaces thoroughly. Even a simple mixture of warm water and soap can greatly enhance adherence. Use fine-grit sandpaper to lightly scuff the surface before applying primer.
- Weather Conditions: Check the forecast and choose a dry, temperate day for painting. If you’re indoors, ensure proper ventilation to allow the paint to dry effectively, avoiding dampness and drafts.
- Choosing Compatible Paints: Consult with home improvement store professionals about paints specifically designed for film materials. Read product labels carefully to ensure compatibility.
- Applying Techniques: Practice on a scrap piece first, if possible. This can help you get a feel for the right amount of paint to use. Use a consistent, steady motion and avoid overloading your brush or roller to minimize streaks.
Take the time for proper preparation and you’ll find the end result much more rewarding!
By being aware of these pitfalls, including recognizing challenges and applying the appropriate solutions, your journey into painting kitchen facades can be smooth sailing. It brings not just aesthetic upgrades but also satisfaction from a job well done!
Finishing Touches and Maintenance
Once the painting process is complete, it's time to consider the finishing touches and how to maintain those beautiful film-covered facades you’ve just transformed. This phase is crucial, as proper sealing and routine care prolong not only the life of the paint but also the overall aesthetics of your kitchen space. Keeping everything in tip-top shape enhances the longevity of your hard work and saves you time and money down the line.
Sealing the Paint
One of the most important steps is sealing your newly painted surface. This protective layer serves as a barrier against moisture, stains, and various kitchen elements. It’s like giving your painted surface an armor. Without this, the paint can wear away quickly, losing its vibrancy and causing you to repaint sooner than anticipated.
When selecting a sealant, look for products specifically intended for use on film surfaces. These often come in spray or brush-on options. Applying the sealant should be done after the paint has completely dried, usually waiting at least 24 hours post-application. Apply even coats; failure to do so might lead to unsightly marks or an uneven finish.
Routine Care for Painted Facades
Maintaining those painted surfaces isn’t rocket science, but it does require some consistent care. Regular cleaning is key. Use a soft cloth and a mild detergent solution to wipe down the surfaces. Harsh chemicals can wreck havoc, so it’s best to steer clear of anything too abrasive.
Here’s a simple routine you might consider:
- Weekly Cleaning: A quick wipe down with a damp cloth will prevent buildup of grime.
- Monthly Inspection: Check for any chips or scratches. Address these promptly to avoid them worsening.
- Avoid Excessive Water: Keep moisture at bay since prolonged exposure can weaken the film.
By dedicating a little time to these simple tasks, you keep the façade looking fresh and new.
When to Repaint
Over time, every painted surface will need a refresh. But how do you know when it’s time to grab that brush again? There are certain telltale signs that indicate your kitchen facades need attention:
- Fading Color: If the colors begin to look dull, it might be time to consider a new coat.
- Chipping or Peeling: This is a clear sign that the paint has started to lose its grip on the film, and you should act before the damage spreads.
- Heavy Stains or Scratches: If these have become too apparent for your liking and regular cleaning isn’t cutting it, a new coat can revitalize the kitchen.
When preparing to repaint, ensure that you start with a clean slate – stripping off the old paint and sanding down any rough areas will give you a fresh surface to work with. This may seem a bit of extra work, but this step is worthwhile for achieving a smooth finish.
"Well done is better than well said."
- Benjamin Franklin
By prioritizing these finishing touches and maintenance steps, you ensure that your efforts in painting kitchen facades made of film are not only preserved but also celebrated as a lasting part of your home's aesthetic.
Epilogue and Final Thoughts
In wrapping up our extensive guide on painting kitchen facades covered in film, it’s crucial to reflect on the significance of each step discussed. Painting facades isn’t simply about slathering paint over a surface; it’s an art form intertwined with practical concerns and aesthetic desires. These works can add a personal touch to otherwise boring kitchen spaces while protecting the underlying material from wear and tear. Moreover, this DIY approach encourages creativity and provides a satisfying sense of achievement.
To summarize:
- Understanding the characteristics of film materials lays the groundwork for making informed decisions about the type of paint and techniques to utilize.
- Proper preparation, from choosing the right location to cleaning surfaces, can mean the difference between a smooth finish and a poorly executed job.
- Selecting the appropriate paint—one that adheres well to film—is vital for longevity and appearance.
- Employing the right techniques while painting ensures that the application is even and that you avoid amateur mistakes.
When you wrap everything up, these elements create a synergy that can lead to a perfect outcome. Taking these steps carefully can lead to impressive results.
The values of this DIY venture extend beyond just aesthetics. The satisfaction of transforming your space with your own hands fosters a sense of pride. Since you are investing time and energy into your kitchen, the resulting ambiance and vibe can significantly uplift your day-to-day cooking experiences.
"The pride that comes from creating something with your own hands is unparalleled. It's not just paint; it's personality."
Empowering yourself through DIY painting projects not only enhances your kitchen’s aesthetic appeal but also contributes to a deeper understanding of home improvement. Embrace the process, and remember: it’s all about enjoying the journey as much as the destination.


